Making Yarn Bowls
The yarn bowl was not on my list of pots to make but after numerous requests I have designed a bowl that I am pleased with and my customers and vendors like.
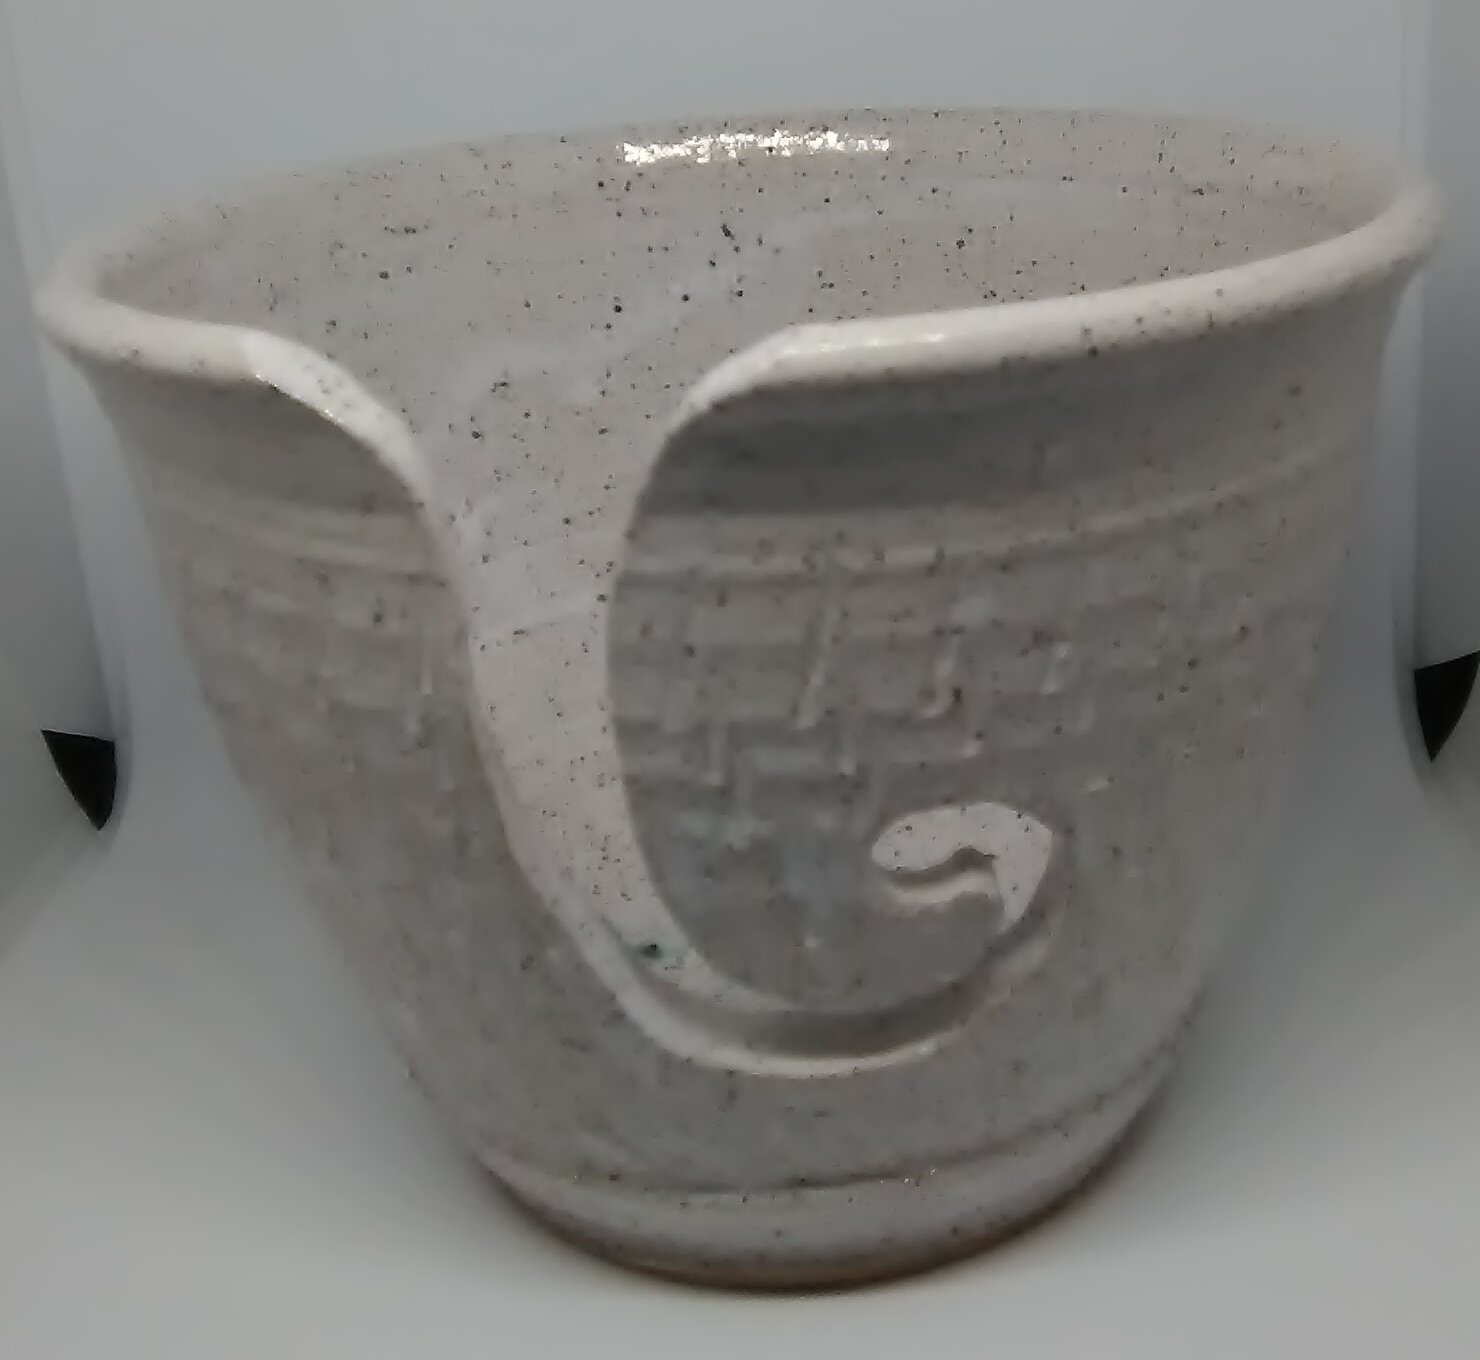
The idea of the yarn bowl is to hold the ball of yarn while you are knitting. The bowl keeps the yarn in one place, not all over the floor. The old way was to use a small basket but often the yarn would catch in the basket weave. My design has gone thru several changes, most recommended by customers and vendors. My current Yarn Bowl has the " J" cut in the fount of the bowl with a single hole in the back. The frount "J" cut allows the knitter to remove the yarn from the bowl without breaking. The hole in the back is for those who knit at home and never take their knitting with them. I have added two more small holes in the side rim of the bowl, these are to hold the knitting needles. I am currently working on a larger version that will hold a skein of yarn, I have not perfected it yet but am close.

The beginning stages are the same for any piece of pottery. After the pot is leather hard the base is trimmed, stamped and signed. Then the cuts that make it a yarn bowl begin. First I cut the reverse "J", this is very touchy, the clay is very tender and if it breaks off you are done, the pot goes back in the clay bucket.

Then the finished Yarn Bowl is put on shelf to dry. After the pot is completely dry it is time to clean the rough edges and the lightly sand the bowl with a green scrub pad. Care must be taken here as one little bit of pressure in the wrong place and the yarn bowl goes in the clay bucket. (Clay Bucket: Pail I put a clay scrap in to be recycled later by putting thru my pug mill/clay mixer.)
After the bowl is completely dry it is time for the first firing, glazing and final firing. Hopefully when I open the kiln after that final firing I have some beautiful Yarn Bowls
