Original Maine Couch Bowl
I created the couch bowl because I like eating in my recliner, every time I sat down I spilled on my shirt. I decided to make a bowl with a cup handle, not to hold like a coffee cup but to cup in the palm of your hand. The result is my Maine Couch Bowl. Enjoy your snacks or meals on your sofa in your Original Maine Couch Bowl.
Making of a Maine Couch Bowl - From Beginning to the End
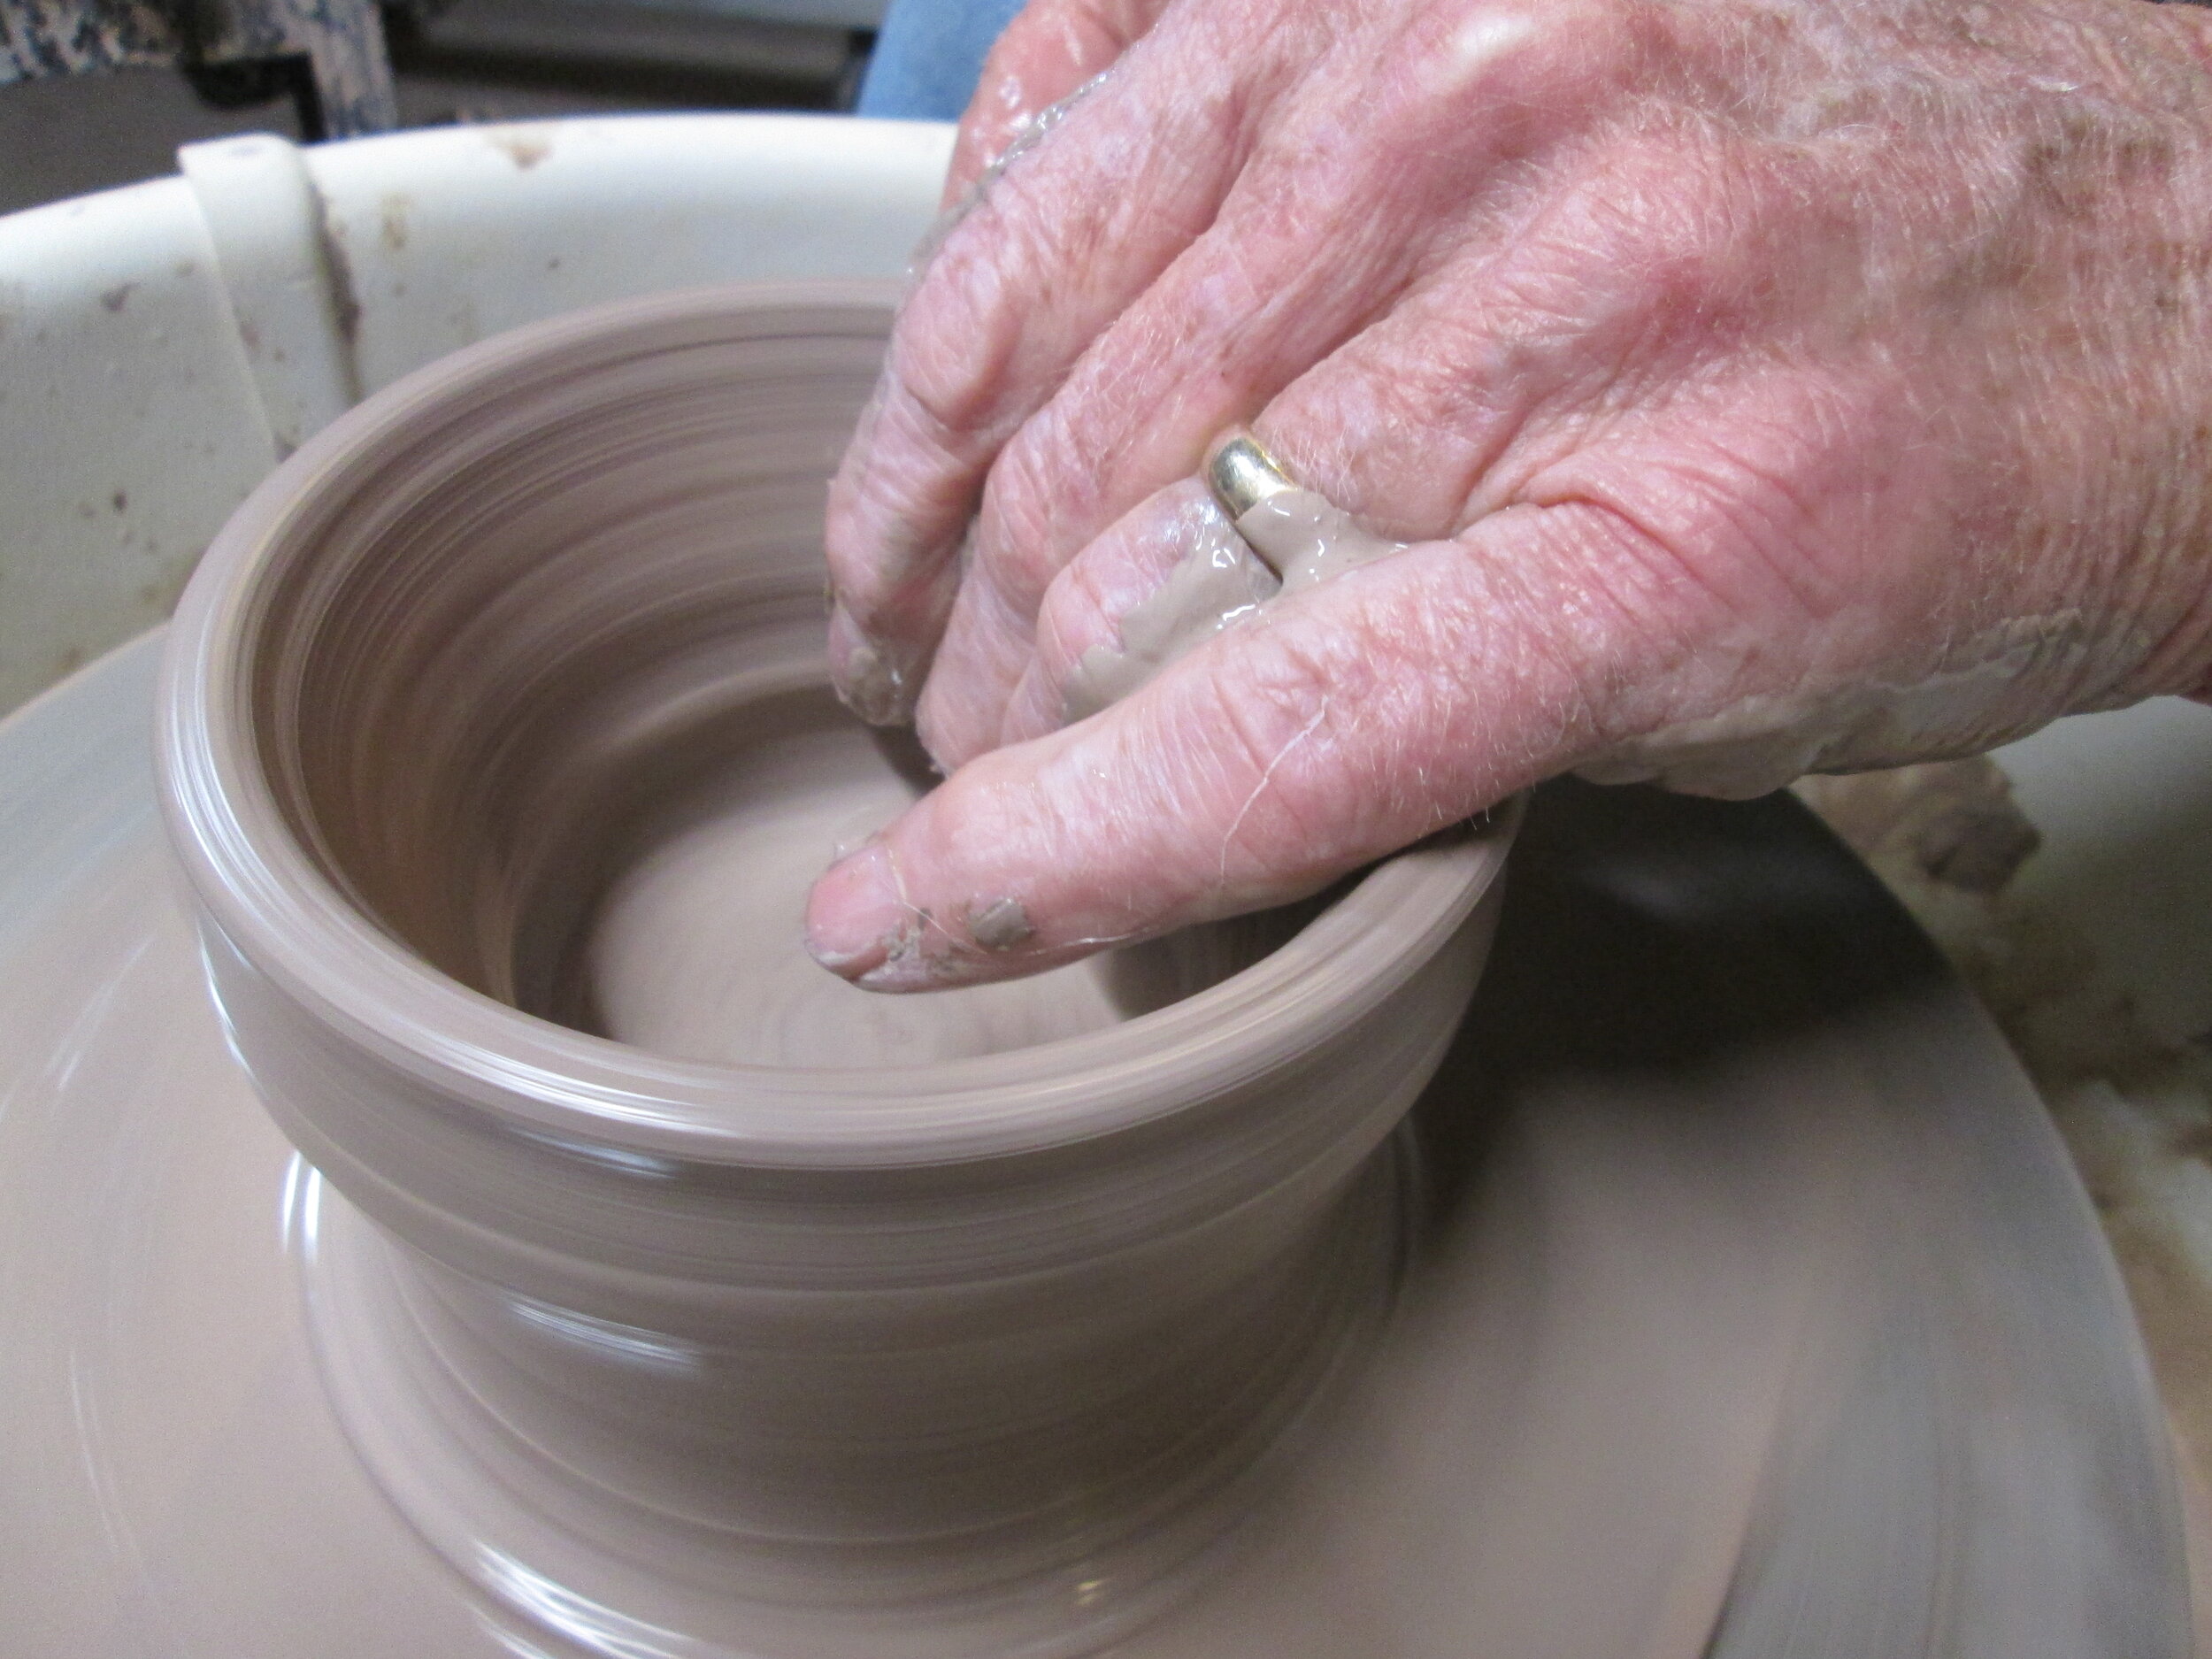
Making of a bowl starts with preparing the clay by wedging, this evens out the clay making it easier to form (throw) on the wheel. After the clay is placed on the wheel it is centered and then opened by making a hole in the center. Using your fingers the sides of the hole are pulled evenly upright forming wall of the bowl. It ususlly takes three pulls to complete the pot. Then the edge, lip, of the bowl is evened off and the excess clay is trimmed for the base.
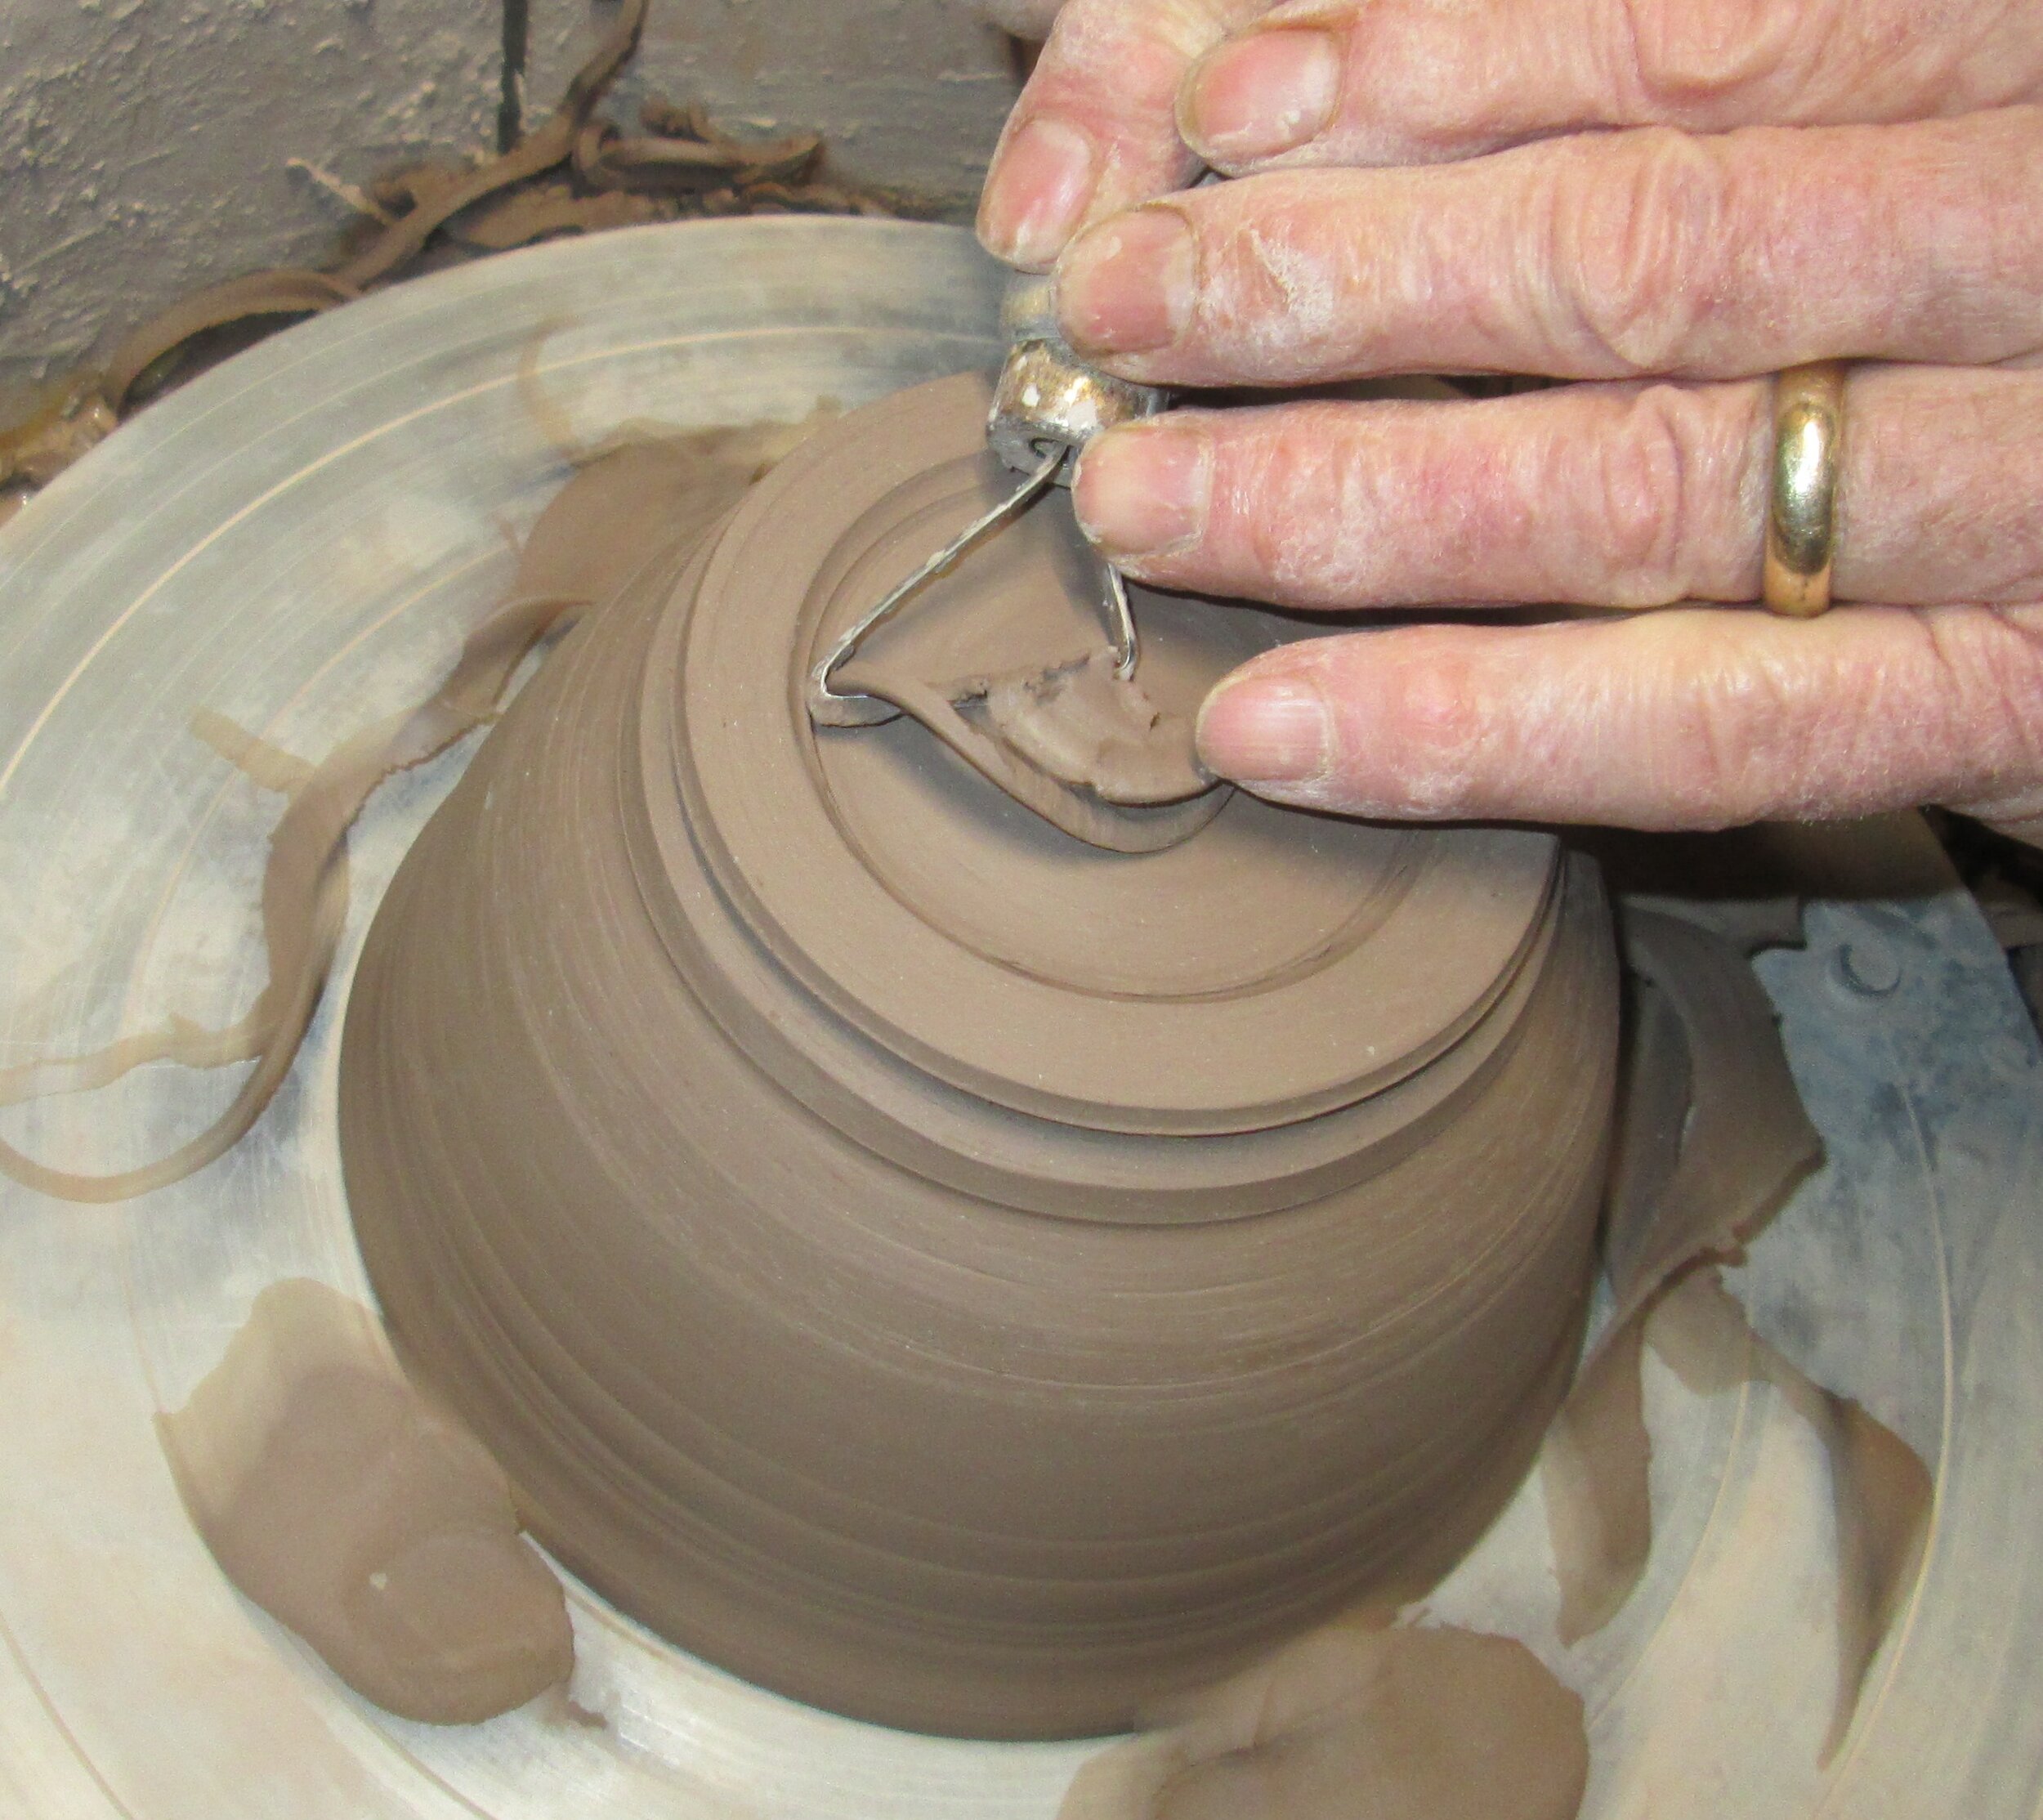
Trimming
After the bowl has dried to a leather hard stage it is returned to the wheel upside down. The bowl is recentered and tacked down to the wheel with small balls of clay to deep it from moving while it is being trimmed. As the wheel is turning slowly the excess clay on the bottom is trimmed, (carved), away forming the base. A good base makes the pot, it helps define and set the pot apart for what it is set on
Stamping
Now is the time to place my stamp on the bowl. In the case of the Couch Bowl I have a special stamp, Original Maine Couch Bowl, with English Field Pottery in the center. After I place stamp in the soft clay I softly tap the stamp to make impring. After removing the stamp I sign the center of the stamp, Art. The pot is now ready to put up to dry. It normally takes several days to dry enough to place in the kiln,(oven). After the pot is dried it is time to clean all small imperfections and burrs that will become permannt when fired. All dried pot are first fired to just over 1800 degrees, this allows easy handling to glaze the pieces with out breaking.

Inspection
It normally takes several days to dry enough to place in the kiln,(oven). After the pot is dried it is time to clean any small imperfections and burrs that will become permanent when fired. Now is time for a final inspection, there is still time to correct some blemish, after the firing it is to late. Time to load the kiln.

Glazing
To make the dried bowl safe and easy to handle without breaking it is fired at a low temperature, 1860 Degreees, in the kiln, this is called a bisque fire. Now it is time to apply the glaze. The glazes that I use are made by me. I have on hand all the chemicals needed to make most stoneware glazes. Before I begin glazing a new load for the kiln I remix and screen the batches of glazes that i have in the studio. After the glaze is ready, smooth, (no lumps) and not to thick I dip the couch bowl into the bucket of glaze. This is for about 3 seconds then as the wet glaze begins to dry i clean the bottom of the bowl with a wet sponge. Now it is ready to return to the kiln for the final firing, 2190 degrees.

Firing and Unloading Kiln
One of the first things that a potter learns is that you never know what you will find when you finally open the kiln after a firing. There are so many variables that affect the finished product. So, to me, opening a load of glazed pots is like Christmas, hopefully beautiful surprises. I find it hard to wait till the complete cool down and often i have to crack the lid to peek but not touch, (to hot). After the kiln is unloaded it is time to inspect kiln for damage, recoat the shelves if needed,(this keeps glaze accidents from ruining a shelf, they are expensive) . Often I immediately begin to put in my next load of pots. The cycle never ends but it is great fun and forever exciting.
